
I am the type that likes to reuse jars and bottles and always remove the paper or sticker label that comes with it. But let’s face it, certain labels and their adhesive can easily be removed on its own or by soaking it under water for 30 minutes, while others are stubborn and leave a sticky, tacky residue.
Whether it’s a sticker label or a product that is completely sticker-wrapped for a product blind-testing, you can use commercial adhesive removers, but here’s the cleanest way to effectively remove sticker residue without using any extra material besides tape.
STEP 1: Peel off the sticker label. Depending on the amount of sticker covering, you can either remove the entire sticker label or a bit at a time and work in sections. By working in sections, this will prevent your hands from sticking onto the packaging while working your way to remove the residue.
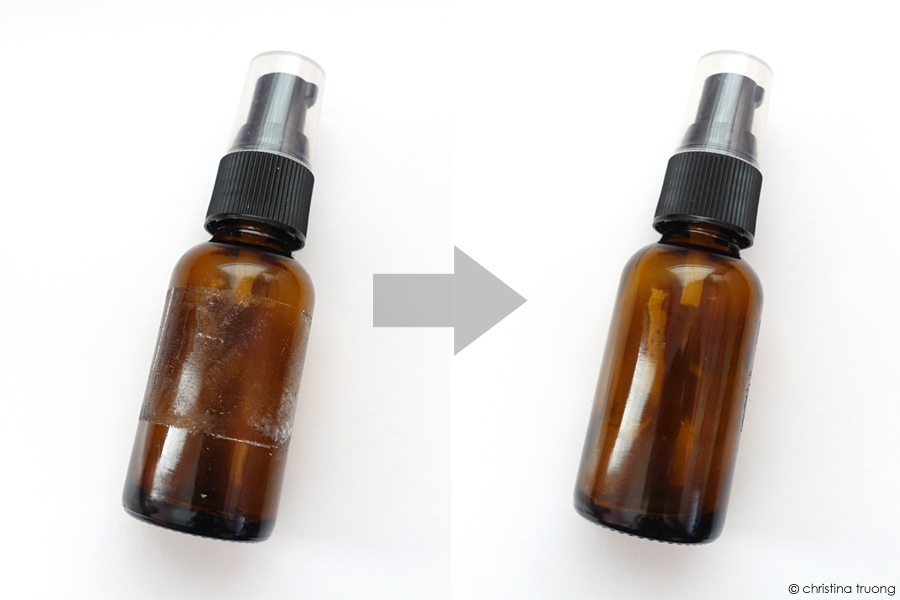
After removing the sticker label, you will see a bit of the sticky/tacky residue.
STEP 2: Using the piece of tape, go over the residue. You will notice that the sticky/tacky residue sticks onto the tape. You’ll have to go over it several times as the sticky/tacky residue may not remove itself at the first try.
Continue until the entire packaging is cleared with no sticky grip. If there is still a bit of stickiness left, go over it with the sticker again until it’s completely sticky-free.
Depending on how much surface of residue needs to be removed, it may be a bit time-consuming. I found it to be a bit therapeutic. If there’s a lot to work on, work in sections, take a break when needed – there is no need to do this in one sitting.
There you have it, this is how you remove sticky sticker label residue!
Check out the step-by-step guide in action in the video below!
Thank you for sharing this. I had such a hard time removing the stickers from mine elle review products a few years back. Ih my it was a challenge.
You’re welcome, Jill!! Glad it could help 🙂